

Turning a wood vase is a popular project among woodworkers, blending both the art and craft of woodworking. Here is a step-by-step method to turn a wood vase:
1. Selecting the Wood:
- Type: Choose a wood that is hard and dense for durability, such as maple, walnut, or cherry. The wood should be dry to prevent cracking as it ages.
- Size: Ensure the wood block is large enough for the vase’s desired dimensions.
2. Preparing the Wood:
- Cut the wood to a rough cylindrical shape using a bandsaw or chainsaw.
- Mark the centers on both ends of the block.
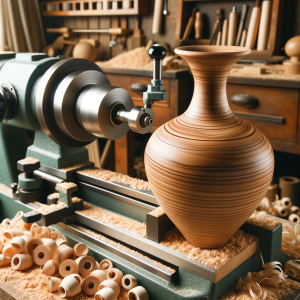
3. Mounting the Wood:
- Secure the wood onto the lathe using a chuck or faceplate attachment.
- Ensure it is centered and tightly fixed to prevent wobbling.
4. Rough Shaping:
- Use a roughing gouge to shape the exterior of the vase into a basic cylindrical form.
- Keep the lathe speed moderate to avoid any accidents due to imbalance.
5. Defining the Shape:
- Use a spindle gouge or bowl gouge to refine the shape of the vase. Consider the neck, body, and base proportions.
- Regularly stop the lathe and check the profile, making adjustments as necessary.
6. Hollowing the Vase:
- Drill a hole in the top center to define the depth of the vase.
- Use hollowing tools to remove the interior wood, frequently checking the wall thickness for consistency.
7. Sanding:
- Start with coarse grit sandpaper and progress to finer grits until the wood is smooth.
- Sand both the interior and exterior, turning the lathe on for the exterior and off for the interior.
8. Finishing:
- Apply a finish that enhances the wood’s natural beauty and provides protection. Options include oils, waxes, or lacquers.
- Allow the finish to dry according to the product’s instructions.
9. Parting Off:
- Once the vase is finished and dried, carefully part it off the lathe using a parting tool.
- Sand the bottom of the vase to remove any marks from parting off.
Safety Tips:
- Always wear safety goggles and a face shield.
- Ensure proper lighting and a clean workspace.
- Be mindful of the lathe speed and adjust according to the size and balance of your wood piece.
- Keep tools sharp for cleaner cuts and less resistance.
Advanced Tips:
- Experiment with different shapes and forms once comfortable with the basic technique.
- Consider adding decorative elements like beads, coves, or burn lines.
- Try different finishing techniques or inlays for a unique look.
By following these steps and tips, you can turn a beautiful wooden vase on a lathe. Remember to take your time, especially during the hollowing and finishing stages, to ensure a high-quality final product.